

 As your react application gets larger, it gets harder and harder to keep track and maintain your states. This is where Redux can come in to help; it is a state management library that provides you with a central state (called the store), eliminating the need to pass props between components.
A quick run through of how Redux works:
- Create the store
- Passing in a reducer as an argument
- Reducer update states accordingly based on the type of actions that are dispatched
If you don't already know what Redux is, I'll recommend you to first read my other article on Redux here .
Getting Started
To get started, we first have to install three packages redux, react-redux, and redux-thunk
npm install redux react-redux redux-thunk
Note: redux is simply a JavaScript library that is used with UI frameworks like React and Vue.js while react-redux is a library that we need to use to connect react and redux together. As for redux-thunk, it is a middleware which I'll explain more in detail in a bit
Jumping In
First things first, we'll need to create the store and the reducer, where the reducer will be passed in as our argument when creating the store.
/* store.js */
import { createStore } from 'redux'
const initialState = { x: 1 }
const reducer = (state = initialState, action) => {
    switch (action.type) {
        case 'INCREMENT':
            return {
                x: state.x + 1
            }
        case 'DECREMENT':
            return {
                x: state.x + 1
            }
        case 'RESET':
            return {
                x: state.x + 1
            }
        default:
            return state;
    }
}
const store = createStore(reducer);
export default store;
Here, I'm specifying the type of actions which the reducer can expect. Notice that it will simply return the original state if none of the action type matches 'INCREMENT', 'DECREMENT' or 'RESET' (this is under the default case). It is always good practice to have a default case.
Next, we'll need to wrap our main App component in a component called Provider, which the react-redux library provides. It enables the Redux store to be available in our React App. It takes in a prop called store, which would be the store we just created.
import store from './store.js'
<Provider store={store}>
    <App/>
</Provider>
Now, without Redux, when creating our React component, we export our components like so:
export default ComponentName;
To make our Redux store available to our components, we will need to call on the connect function provided by the react-redux libary like so:
export default connect()(ComponentName);
The connect function actually takes in two optional arguments being mapStateToProps and mapDispatchToProps.
mapStateToProps
As the name of the function suggests, mapStateToProps enables us to easily map our central state (i.e., our store) to the props of our react component. The result of this means we can access our states through props without needing to pass states between components as we had to do when without Redux.
For example, suppose we want to be able to grab our state 'x' that we have in our store so that we can access it in our component. Then our mapStateToProps function in our component will look like:
const mapStateToProps = state => {
    return {
        x: state.x
    }
}
Which will be passed to the connect function of our component:
export default connect(mapStateToProps)(ComponentName);
Now, we can access our state value 'x' by simply doing props.x
mapDispatchToProps
Similar to mapStateToProps, the mapDispatchToProps function enables us to map functions that dispatches action (I'd like to call these functions dispatchers) to our props. All the function does is returning a plain JavaScript object that contains functions which dispatches actions. The function has a dispatch function as the first argument and an optional ownProps argument. Note that if your mapDispatchToProps function takes two parameters, the function will be re-invoked whenever the connected component receives new props.
For example, with the following code...
const mapDispatchToProps = dispatch => {
  return {
    increment: () => dispatch({ type: 'INCREMENT' }),
    decrement: () => dispatch({ type: 'DECREMENT' }),
    reset: () => dispatch({ type: 'RESET' })
  }
}
export default connect(mapStateToProps, mapDispatchToProps)(ComponentName);
Allows us to do the following...
function App({ x, increment, decrement, reset }) {
  return (
    <div className="App">
      <button onClick={decrement}>-</button>
      <span>{x}</span>
      <button onClick={increment}>+</button>
      <button onClick={reset}>reset</button>
    </div>
  )
}
Alternatively, we can define mapDispatchToProps with action creators instead. An action creator is a function that generates and returns an action (it doesn't dispatch the action). If we define mapDispatchToProps like this, connect will automatically call bindActionCreators for you internally which basically wraps our action creators into a dispatch function so that calling them dispatches the action.
For example, the following implementation of mapDispatchToProps does the exact same thing as our previous implementation.
const increment: () => ({ type: 'INCREMENT' }),
const decrement: () => ({ type: 'DECREMENT' }),
const reset: () => ({ type: 'RESET' })
const mapDispatchToProps = dispatch => {
  return {
    increment,
    decrement,
    reset,
  }
}
export default connect(mapStateToProps, mapDispatchToProps)(ComponentName);
Redux Thunk
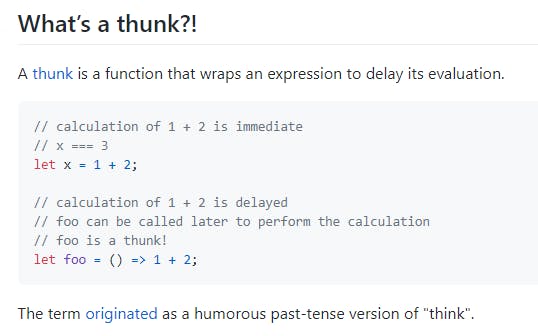
Oftentimes, when building a web application, you'll need to call on APIs which means some asynchronous action is going on. Redux Thunk is a middleware that to do these asynchronous actions with Redux. Redux, by itself, does not allow asynchronous actions and this is troublesome if we want to dispatch an action that fetches data from an API for example. The thunk can be used to delay the dispatch of an action, or to dispatch only if a certain condition is met.
Quoted from the official documentation:
Redux Thunk middleware allows you to write action creators that return a function instead of an action. The thunk can be used to delay the dispatch of an action, or to dispatch only if a certain condition is met. The inner function receives the store methods dispatch and getState as parameters.
To use redux-thunk, we can modify our code as follows when creating our store:
import { createStore, applyMiddleware } from 'redux';
import thunk from 'redux-thunk';
const store = createStore(reducers, applyMiddleware(thunk));
Going to our earlier example with our simple increment action creator, with Redux Thunk, it will now have the following structure, which allows us to do asynchronous actions before dispatching our actions.
const increment: () => async (dispatch, getState) => {
    /* some asynchronous action here */
    const asyncVal = await someAsyncCall();
    dispatch({ type: 'INCREMENT', payload: asyncVal })
},
And that's basically it for this simple guide to using React with Redux + Redux Thunk! Thanks for reading and hopefully this all makes sense!